Sunday 31 July 2011

Bitter Chocolate Madeleines


Part of me loathes buying new baking tins.  The sheer amount of space they take up is ridiculous.  So I thought I would try out some new recipes with the more unusual tins that I have.  (This means more donuts! Win!). 

I needed to make something quick for a couple of wedding supplier meetings we had today (which went fabulously!) and decided on madeleines.  I’ve made some before but decided to try out a different recipe. 

Original recipe tweaked from here

Ingredients
115gr butter
130gr self raising flour
3 eggs
135gr golden caster sugar
½ tsp good vanilla extract
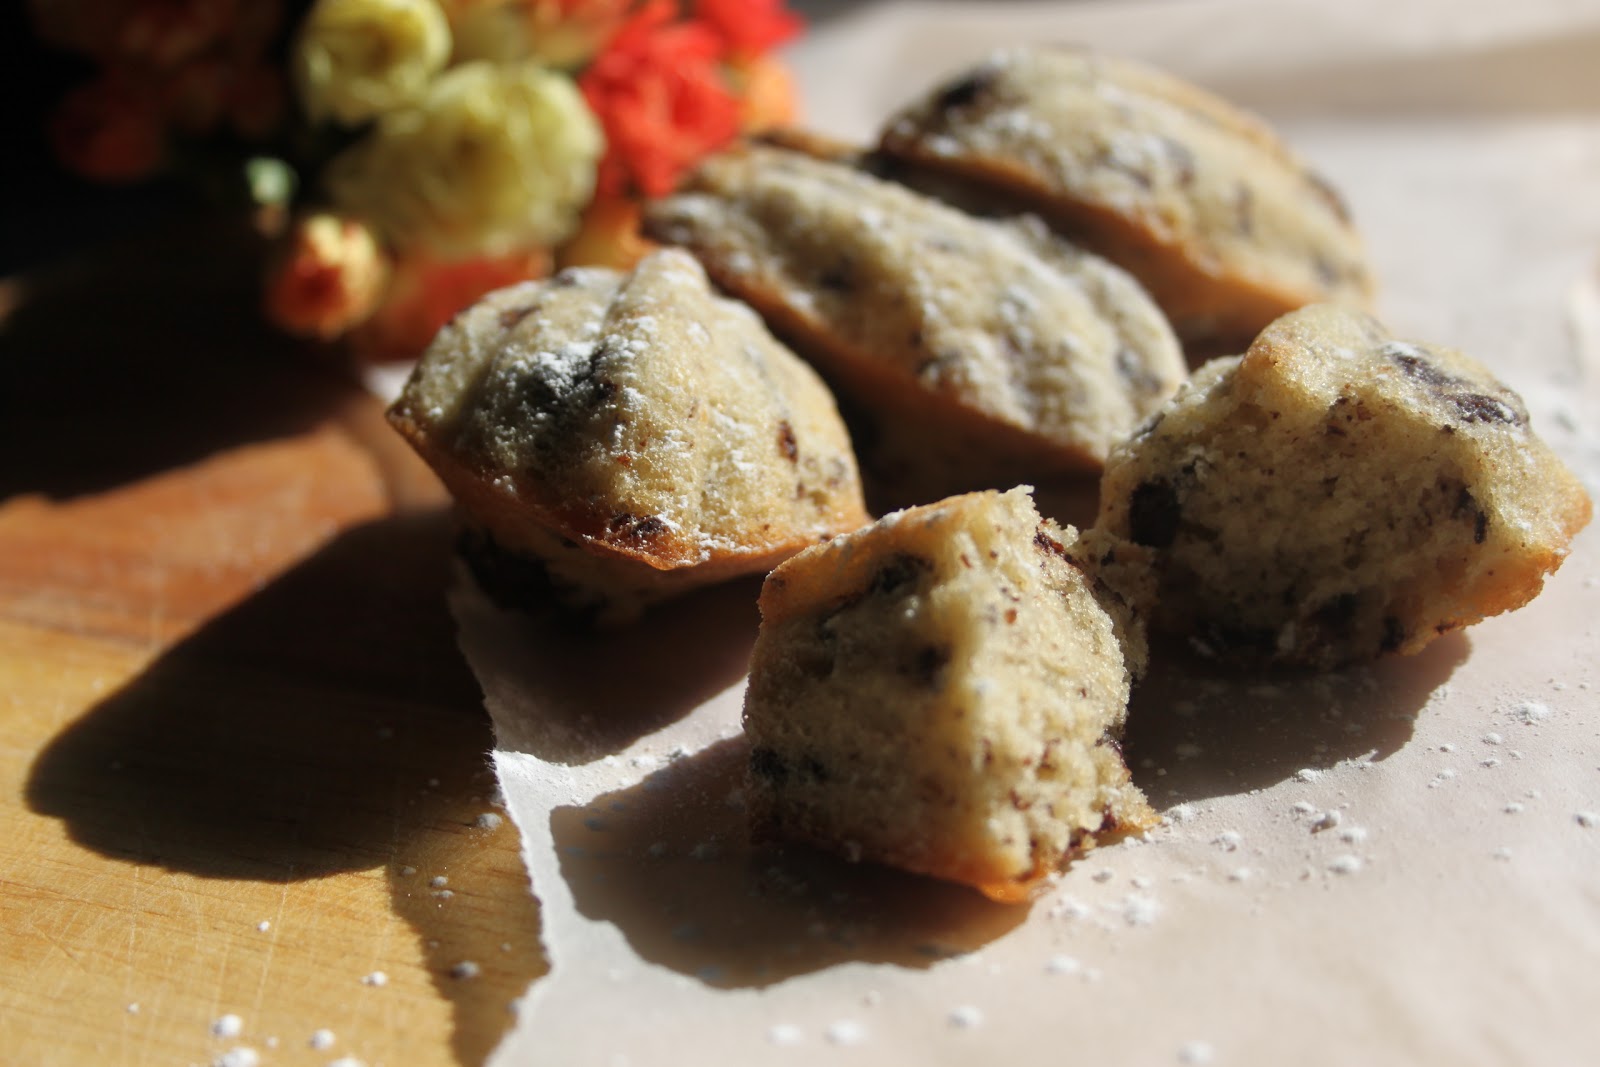
75gr bitter chocolate, chopped.  I used about 85% cocoa chocolate. 


Method
1, Melt the butter and leave it to cool
2, Beat the eggs and sugar together until pale and creamy looking.  This takes about 5 minutes and then beat in the vanilla extract.
3, Sift in a third of the flour into the eggs and gently fold in with a spatula.  Add the rest of the flour in two additions in the same way. 
4, Add the butter in three additions, gently folding in with a spatula.
5, Add in the chopped chocolate.
6, Butter and flour your madeleine tin well and fill them up to just below the lip of the indents.
7, Bake in a preheated oven to (190o/c) for 8-10 minutes until they are lightly golden brown and springy to the touch. 
8, Remove from the oven, leave for a minute or two and turn out onto a cooling rack.
9, Dust with icing sugar and serve.  

Sunday 24 July 2011

Pistachio and Whisky Shortbread


Isn’t it funny when you make a recipe and it turns into something completely different.  This was purported to be Pistachio Biscotti.  But the recipe didn’t call for it to be twice baked and it wasn’t dry and crunchy, so in my book, it’s not biscotti.


But it is really, really tasty!  I added whisky rather than rum and that lovely smoky oaky flavour is there without the overly boozy taste.  And I love whisky. 

Adapted from here 

Ingredients
225gr butter
140gr caster sugar
1 egg yolk
2tbsp good whisky
Couple of drops of vanilla extract
280gr plain flour
100gr shelled pistachio nuts
Pinch of salt

Method
1, Beat the sugar and butter together until pale and fluff
2, Mix in the egg yolk, zest, whisky, vanilla extract and salt
3, Sift in the flour and add in the pistachio nuts and gently mix together to form a dough.


4, Form a log with the dough, wrap in clingfilm and chill for an hour to firm it up.
5, Preheat your oven to 190o/c
6, Remove the dough from the fridge and unwrap the clingfilm.  Cut into wedges about 5mm-1cm thick.  Arrange on two lined baking sheets
7, Bake for 10 minutes until just starting to turn golden brown and remove from the oven.  Leave on the baking trays for at least 10 minutes before moving onto a wire cooling rack to cool through.
8, Store in an airtight container. 


Thursday 21 July 2011

Versatile Blogger Award


The very lovely Mrs Stranded over at Stranded in Cleveland has awarded me this decoration! Thank you!  Please go and take a look at her lovely blog for yummy looking recipes and beautiful crafty finds!

This award comes with a provision where I have to share seven things about myself.  I’ve already shared seven previously here so I’ll see if I can come up with seven more…


One
I ran my fourth Race for Life earlier this month.  Without sounding so gushy, it’s amazing to see so many women banding together and running for a single cause.  


Two
As stated in my last seven things, I was just about to take up pole dancing lessons.  Five and bit months later I’m still going and loving every minute of it!  The Mighty Grip sounds a bit grubby but it stops me falling on my face when doing the upside downy moves! 


Three
I carry a note book around with me everywhere.  It’s a mess of scribbles recipes, cake ideas, sketches, meal plans and lists. 


Four
If I could pick one book to read over and over again it would be The Beach by Alex Garland.  This is my tatty, over thumbed, cracked spine copy. 


Five
I’m getting married in just under ten months.  I have The FearTM when it comes to planning things!  This is my wedding planning book.  I also have a spreadsheet.  I get really excited about updating my spreadsheet. 

Six
I’m one of those people that notice the mistakes in films/tv shows/adverts.  Jim just rolls his eyes when I say things like “she was wearing nail varnish in the last shot…”

Seven
The last song I downloaded was a cover of ‘Tainted Love’ by Hannah Peel.  It’s off that mouthwash advert with the woman who has nail varnish on one moment and then in the next shot doesn’t… *cough cough*

I would like to pass this award on to some fellow lovely bloggers, as follows:

Saturday 9 July 2011

We Should Cocoa: Apricot Chocolate Bites


This month’s We Should Cocoa is hosted by Chele at the Chocolate Teapot.  This month’s ingredient we have to incorporate into something special was apricots.  Last month’s bumper strawberry round up can be found here!

I recently bought my sister a set of alphabet cake moulds from this lovely website after I fell in love with the set that I won from Sarah-Jane’s blog.  I also picked up this cute little silicone chocolate mould and I’ve been waiting to find something to do with it.  So this is what I came up with.


Ingredients:-
50-80gr good dark chocolate
8 small dried apricots
2tbsp cake crumbs

Method
1, Melt the chocolate and paint the inside of the chocolate moulds.  Chill these in the fridge until set and then give them another layer before chilling again.
2, Whilst the chocolate moulds are chilling, cut rounds from the apricots that are the same diameter as the base of the mould.  I used a piping tip to do this.  Separate each round into two little circles of apricots and chop up the off cuts of apricots
3, Mix the apricot off cuts with the cake crumbs and a teaspoon of the melted chocolate.  This should make it sticky enough to press together.
4, Remove the mould from the fridge and press in a tiny bit of the crumb/chocolate/apricot filling into each one, keeping a gap at the top big enough to…
5, …Press in one of the apricot rounds sticky side down, cover with chocolate and chill again.  
6, Chill these for a minimum of 30 minutes before turning out and serving.

Please note the amounts I used are pretty approximate for 15 small chocolates.  It was one of those creations where you don’t really write down the amount of each component you use!

Monday 4 July 2011

A Gift for a Gardener

As mentioned in previous posts my parents have a large garden divided into lawn, patio, fruit trees and bushes and vegetable patches.  My dad is an avid gardener.  You’ll see him hunched over seed catalogues in the winter months, sowing and nurturing seedlings in spring, pottering around in the sheds and greenhouse in summer and sharing out all the fruits of his hard work.  You’ll also see him carefully checking on the sweet peas he grows for my mum behind the greenhouses. 

This year is a special birthday for my dad.  He has reached the big 6-5. And thus retirement!  You should have seen the glee on his face when he was telling us about the first proper day off he would have had in decades!  So I made him something special for him and the garden.

It’s simple, all you’ll need is a box, some black waterproof paint and a steady hand! (and bits to put inside!)

The box

The text, which I outlined on the reverse and then scrubbed over the top when it was positioned on the box.


Painting.  Yeah.  I have an Art GCSE.  Finally, comes in handy…

 Complete!

 Cheap herb pots…

 …Jazzed up with a bit of cellophane and some raffia! (Remember to include the growing instructions!)


A gardening journal from Paperchase and a little seed marker, just from Wilkinsons. It cost me a whole British pound!

Plus I couldn’t resist this!


Complete!