Friday 29 April 2011

Eton Mess Union Jack-arons


Has everyone enjoyed today’s festivities? We had a little BBQ with some lovely friends and served these for dessert!


Their basic macaron shells, with Union Jacks painted on them and filled with whipped double cream and finely chopped strawberries. 


I hope everyone is having a lovely day and best wishes for the special couple!

My little Peach is worn out already!

Friday 22 April 2011

Mini Hot Cross Buns


I feel like a giant when I eat these.  I deliberately move in slow motion and make a loud scoff sound.  Please don’t feel obliged to do this though.  It does make eating them far more fun…

Easter wouldn’t be complete without hot cross buns and these are my favourite apple and cinnamon ones.


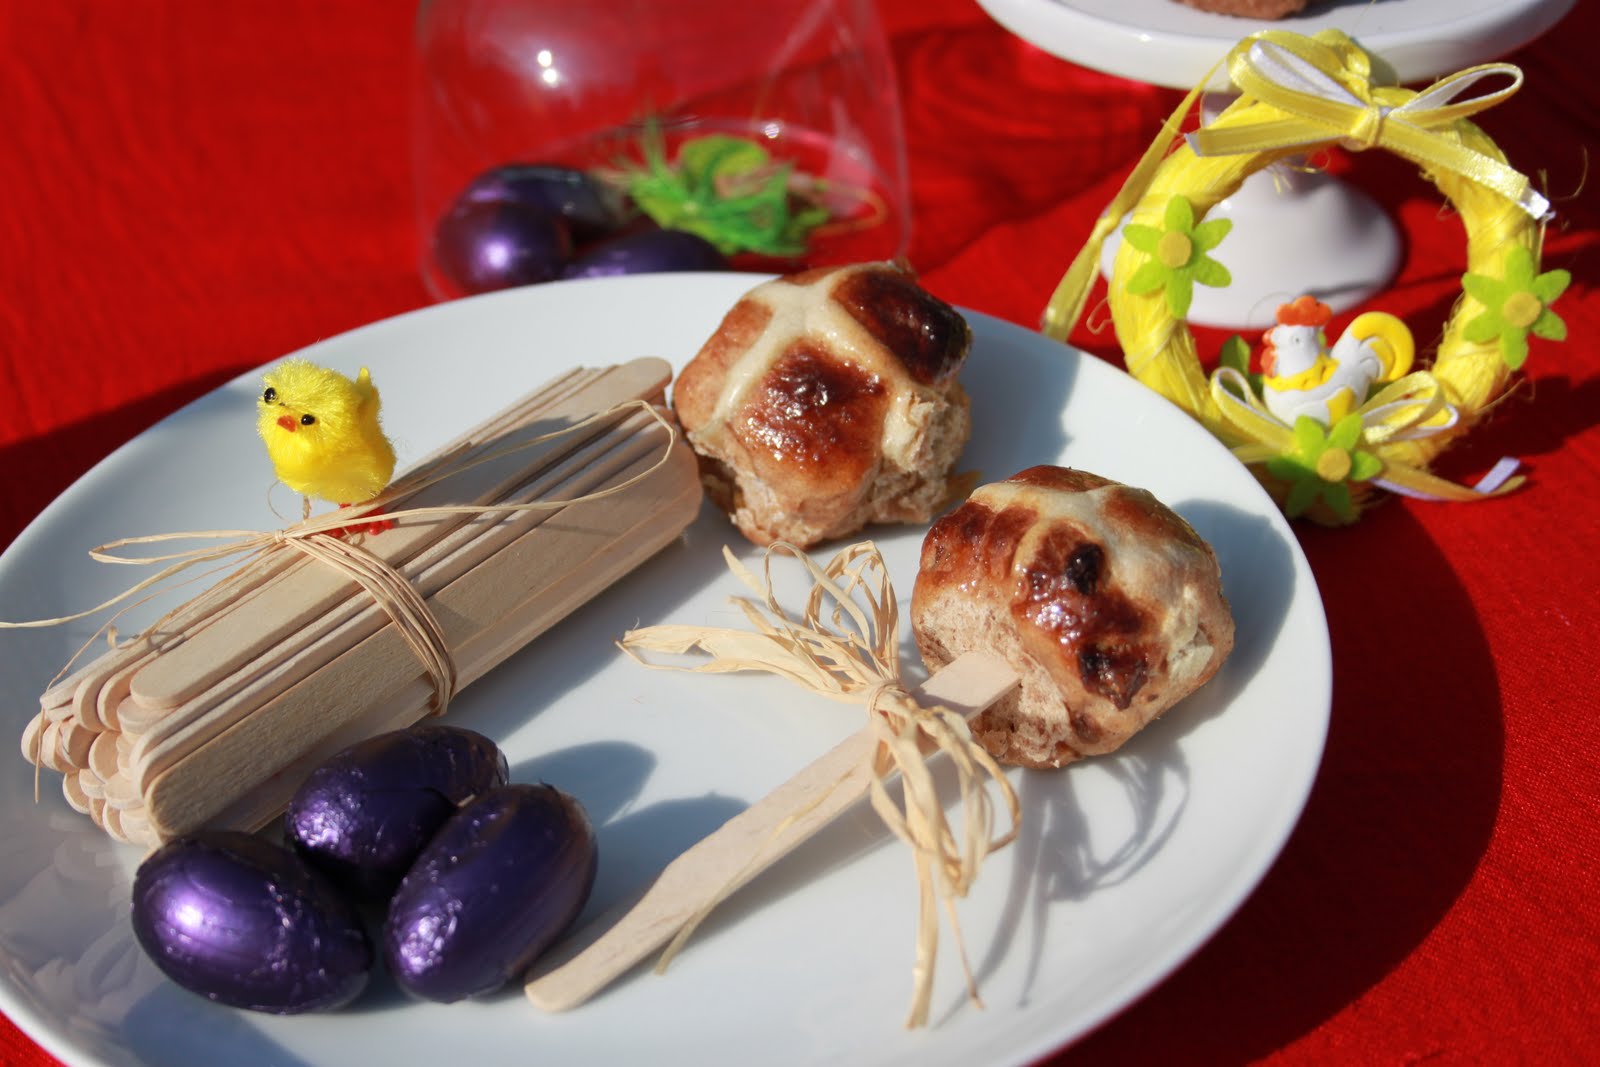
Plus, these are living proof that if you put something tasty on a stick, people will say ‘awwh’…

Ingredients
Zest of one lemon and one orange
100gr sugar
650gr apple and cinnamon bread flour (or 630gr strong white bread flour, 2tsp ground cinnamon and 20gr dried apple, cut into small pieces)
Pinch of salt
1tsp mixed spice
1 packet of easy blend fast action yeast (7g)
140gr sultanas (chopped up finely)
1tbsp brandy
1 egg
300ml warm milk

Plus flour and water blended together to make a thick paste for piping the crosses on top. 

Method
1, Mix the zests with the sugar and leave to one side for a couple of minutes
2, Sift the flour, salt, spice and yeast into a large mixing bowl and add the apple chunks left in the sieve in too.
3,Take a tablespoon of the flour mix and toss the sultanas in them, set these aside as well.
4, Stir in the sugar.
5, Beat the egg and add that to the bowl with half of the warm milk. 
6, Stir slowly, adding the rest of the milk bit by bit until you get a very slightly sticky dough.
7, Turn the dough onto lightly floured work surface and knead for 5 minutes until the dough is soft and elastic. Knead in the chopped sultanas in well 
8, Put into a greased bowl and cover with cling film and leave to double in size in a warm place for an hour or two.
9, Knock back the dough with your fist and give it another quick knead.
10, Return to the greased bowl, cover back up with cling film, return to the warm place for another hour.
11, Divide the dough into little balls and place in a greased oven proof square dish.  I made 24 mini ones and 4 average sized ones.  Pipe a thin cross of the flour/water paste onto each of the buns
12, Cover and leave somewhere warm for another 15-30minutes
13, Preheat the oven to 220o/c and bake the small ones for 8 minutes and the big ones for 10 minutes until they are golden brown.
14, Brush the tops with sugar syrup mixed with a little mixed spice when they are fresh out of the oven and leave to cool slightly before eating.  Keep in an airtight container. 


Oh! It’s also my hundredth post! That sneaked up quickly!

Sunday 17 April 2011

Mini Baked Chai Doughnuts

I found it! I found it!


Last time I was looking for my doughnut tin, I had a nasty cold.  I had made my doughnut batter but then couldn’t find the tin and ended up making something else.

Still, tiny chai donuts danced on my mind. 


This morning I was pulling out all my cake tins looking for a couple of baking sheets and my Teflon baking mat when there, glinting at me, snuggled between my Madeline tin and a silicone ice cube mould was the doughnut tin.  I stared at it.  You little… In my snot filled haze I couldn’t see the wood for the trees.  Or indeed the tin in the tins…

So, the chai doughnut experiment proceeded.  And I deem that experiment to be a success!


Makes around 24 mini doughnuts
Ingredients
140gr plain flour
3tbsp instant chai powder
80gr golden caster sugar
1tsp baking powder
½ tsp salt
Zest of one lemon
1 egg
2 tbsp melted but cooled butter (plus extra for greasing)
250ml buttermilk

Icing sugar and cinnamon for dusting


Method
Preheat oven to 180o/c
1, In one bowl sift together all the dry ingredients
2, In another bowl/jug mix in the wet ingredients and lemon zest together well
3, Pour the wet ingredients onto the dry ingredients and stir until just combined, like muffin batter
4, Line your mini doughnut tin well with melted butter and dust onto of that a little more plain flour, just to make sure they don’t stick. If your using a silicone mould then this shouldn’t be a problem!
5, Fill each little doughnut indent about half full with the batter. It is a pretty sticky and gloopy batter so I ended up putting it into a freezer bag, snipping off one of the corners and using it like a makeshift piping bag.  Less is more when filling the tins, or else you’ll end up with these Jabba sized ones with no hole…


6, Bake for around 4-5 minutes until firm to the touch and risen.
7, Remove from the oven and take the doughnuts out of the tin and cool on a cooling rack.
8, I rolled these ones in sifted icing sugar with cinnamon.  


Thursday 14 April 2011

We Should Cocoa: Marzipan, Chocolate and Cherry Ice Cream


This month’s We Should Cocoa is being hosted by Choclette over at Chocolate Log Blog.  You can see the round up of the Lime round up here.  This month’s ingredient we have to incorporate is marzipan.  


There is nothing like your home county bathed in sunshine.  The best friend and I headed to the seaside (mainly to play crazy golf, which she beat me at, and play on the 2p machines).  We sat right on the shoreline, occasionally scooting backwards if we saw a big wave which threatened nothing but wet bums and wet handbags.  We headed back home just after lunch and rallied the troops to the nearest beer garden where we sunned our faces and drank ginger beer. 

Sitting back in those garden chairs, eyes closed with the sun gently beating down on our cheeks reminded me of when Jim and I went to Rome on an impulse.  We sat in the Vatican City and just soaked it all in.  The history, the romance, the strange behaviour of some tourists.  But secretly, we were just using the time to digest a huge Italian bistro meal and a copious amount of marzipan, cherry and chocolate ice cream…

I don’t own an ice-cream maker and even though I have my eye on one, I wanted to make this ice-cream.  I remembered that Chele over at the Chocolate Teapot had made a no-churn ice cream and had bookmarked it to do at some point.  Now is the perfect time to break it out despite it being cloudy and grey!  I’ll work on that bikini body later…


Ingredients
600ml double cream
½ a 397gr can of condensed milk
Couple of drops of almond essence
50gr to 100gr marzipan (according to taste, more the merrier in my opinion…) chopped
100gr cherries (fresh or canned, I used canned… Shh…), chopped
100gr good quality dark chocolate, chopped

Method
1, Beat the cream, condensed milk and almond essence together until it comes to the consistency of thick clotted cream, this doesn’t take long so keep an eye on it to make sure you don’t overbeat it
2, Gently fold in the chopped cherries, marzipan and dark chocolate.
3, Line a loaf tin with greaseproof paper and add in your very soon to be ice-cream. 
4, I gave mine a couple of sharp taps on the work surface to remove any air bubbles and gently cover with some more greaseproof paper
5, Freeze until solid and then it is ready to enjoy.  

Wednesday 6 April 2011

Lemon and Ginger Marshmallows


Prior to my last post, I had an entire weekend of baking fails.  Macarons that formed a giant sticky sheet of macaron.  Sticky ‘moist’ ginger muffins that would have been suitable substitutes for clay pigeons and I don’t want to talk about the lemon ‘cake’…

So I decided to have a go at marshmallows.  I’ve been itching to dust off my sugar thermometer and play with some hot sugar… That sounded crazy, but I’m waiting for this to turn up and I am overly excited…

Basic marshmallow recipe from Delicious Magazine

Ingredients
120ml boiling water
Grated zest of one lemon
1/2 inch piece of fresh ginger, grated finely
1tsp honey
160ml golden syrup
440gr golden caster sugar
23gr powdered gelatine
Yellow food colouring
Vegetable oil for greasing
Couple of tablespoons of cornflour and icing sugar mixed together. 

Method
1, Put the lemon zest, grated ginger and honey into a jug.  Pour on the boiling water and leave to cool.  When this is cold, sieve out the zest and ginger so you are left with a ginger and lemon cold infusion.  Put this into the bowl of a stand mixer, fitted with a whisk attachment, and add in the gelatine to the cold infusion and leave it to sponge.
2, Add the sugar and golden syrup into a medium sized saucepan and add enough cold water to cover it.
3, Turn the heat to low and stir until the sugar melts.
4, Using a damp pastry brush remove any rogue sugar crystals from the edge of the pan.  You don’t want these falling in as it might trigger the syrup to crystallise.  Turn the heat up high
5, Bring the syrup to a boil and continue to heat it until it reaches 130o/c on a sugar thermometer.  Remove from the heat and leave to one side for a minute. 
6, Turn your stand mixer on and slowly pour the hot sugar syrup into the bowl.  Be careful not to hit the spinning whisk. 
7, Beat until it goes white and fluffy and add in a couple of drops of yellow food colouring.
8, Whilst its beating, line an 8 inch square cake tin with greaseproof paper.  Brush that lightly with vegetable oil and then dust with a little cornflour and icing sugar.  Make sure you oil up the sides and dust those also.
9, When the marshmallow is ready, it will take on the consistency of really sticky bubblegum, carefully pour it into the prepared tin.  Using a tablespoon dipped in water smooth the top out and then dust the top with some more of the cornflour/icing sugar mixture.
10, Leave in a cool place for a couple of hours until it has set.
11, Cut into squares and roll in more of the cornflour/icing sugar mixture.  These will keep for around 2 weeks in an airtight container.  

Saturday 2 April 2011

Mocha Crinkles


I mentioned in my last post Jim and I had just celebrated our 6 year anniversary.  We decided to treat ourselves and buy a coffee machine.  We had a wander around an English Heritage site near Canterbury and then popped into a couple of cookware shops to find a coffee machine.  We found one we liked, asked if they had it in cream (I only have one specification, it has to match Rosie the Kitchenaid) and they didn’t.  We decided to Amazon it when we got back home. 

Then we made a fatal (to the coffee machine idea) mistake.  We nipped into Currys on the way home.  And walked out with a new TV.  I’ll admit that it’s 37 inches of beautiful, skinny LED-ness but farewell coffee machine, our budgets been blown.  Blown out of the water. 

I still fancy something coffee-y though.  Cue these little bites of happiness. 

Ingredients
175gr self raising flour
80gr golden caster sugar
1tsp instant coffee powder (or granules that are ground into powder)
½ tsp cocoa powder
100gr cold butter
1 egg

2tbsp cocoa powder mixed with 1 tbsp icing sugar for rolling the dough balls in

Method
1, Sift the flour, sugar, coffee and cocoa together
2, Cut the butter into chunks and rub it into the dry ingredients until it resembles breadcrumbs and no big bits of butter are left.
3, Add in your egg and bring the dough together to form a dough.  Wrap this in clingfilm and pop in the fridge for 30 minutes.  You don’t have to but it makes it a little easier to roll into balls.  It can be quite sticky.
4, When the dough is chilled, scoop up tablespoons of the dough, roll into balls and then roll in the cocoa/icing sugar mixture.
5, Place the balls on a lined baking sheet and refrigerate for a further 20 minutes
6, Preheat your oven to 180o/c and bake for 15-18 minutes until cooked through.