Wednesday, 30 October 2013

DIY Walnut Whips


The bare branches of the tree tapping and scraped on the kitchen window.  She shuddered.  Goosebumps shivered up and down her arms as she pulled her jumper tighter.  Had it got colder? 


The soft whirl of the stand mixer was her solace.  She turned it off and it brought a deafening quiet over the kitchen. She raised the head and scraped the pale,  creamed butter and sugar back down. She lowered the spatula and slowly turned her head.  She couldn't shake the feeling that something was wrong. And it was just waiting for her to realise...


Armed with the spatula, she walked towards the green cardboard box on the counter top.  A sense of foreboding washed over her. She slowly lifted the lid. She saw something she didnt want to see.  A purely reserved for the stuff of baker's nightmares. Something that she wouldn't wish on her enemies....


There was only one egg left.

She lowered the spatula.  Bit the inside of her cheek. Looked at the stand mixer. Couldn't continue with her cake plans.  And decided to make walnut whips instead. 

Ingredients

Chocolate Shell 
200gr milk chocolate

Marshmallow Filling
12gr powdered gelatine
60ml cold water
80ml golden syrup
220gr caster sugar
1tsp vanilla extract
Water

Topping
4 walnut halves (or more, these are big)

You will also need four silicone dariole moulds. Mine were roughly 9cm high. 

Method
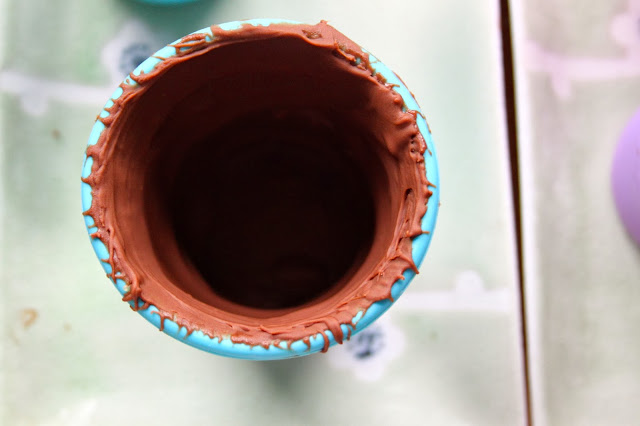
1, Melt the chocolate and paint the inside of your dariole moulds with a layer of chocolate. Leave these in the fridge to cool before painting with another layer. Return these to the fridge until you are ready to fill them. You won't use all the chocolate up yet, we need some left over to cover the bases. 


2, Make the marshmallow filling by putting the gelatine and cold water in the bowl of your stand mixer. Stick on the whisk attachment so you are ready to go when your hot sugar syrup is ready. 
3, In a medium sized saucepan add in the golden syrup, caster sugar and a good couple of splashes of water to cover it. Set over a medium high heat and stir until the sugar has dissolved. When it has all dissolved, stop stirring and use a damp pastry brush to remove any rogue sugar crystals from around your pan. If these fall in, they could trigger crystalisation and that would be a bummer. 
4, You want to boil the sugar syrup until it reaches 140o/c on a sugar thermometer. When it has, remove immediately from the heat, set your stand mixer to a medium speed and with it running, pour a slow trickle of the hot syrup directly into the bowl. Try not to hit the spinning whisk attachment. Or you end us with a whisk attachment that looks like this and hard sugar crusted over everything you love. (inside of your stand mixer bowl). 


5, Keep the stand mixer running until your marshmallow turns white and has the consistency of really sticky bubble gum. This can take around five minutes but keep an eye on it. 
6, Wrestle the marshmallow into a pipping bag. You don't need to both with a piping tip.
7, Remove your moulds from the fridge and fill each of them almost to the very top with the marshmallow. It should level itself out slowly. (Optional -Squeeze the rest of the marshmallow into your mouth.)
8, Using some of the left over chocolate, cover the top (which will be the bottom) so that no marshmallow is peeking through. Again, keep a bit of the chocolate for sticking on the walnut halves. Stick these back in the fridge for at least an hour. 
9, Unmould the whips from the silicone moulds. Using the very last of the chocolate, use it as glue for sticking on the walnut halves. Stand back and admire your handiwork. Eat these within a day. It's not hard. 

Wednesday, 23 October 2013

We Should Cocoa: Vegetable Crumble


This month's We Should Cocoa is hosted by JibberJabberUK who has challenged us to create a vegetabley chocolate creation.  Last month's Chocolate Showstopper challenge can be found on Choclette's blog here.  You can read all about We Should Cocoa on the founder's blogs - Chocolate Log Blog and Chocolate Teapot.


Does your fridge ever suffer a case of the Saturdays? You know when you've been too busy to food shop during the week and all you're left with is some questionable carrots and three mushrooms?  There is also a tiny tub of cream that is careering towards not being safe to eat. This is the crumble for you. You can clean out your veg drawer, and shake some pumpkin seeds out of your cupboards too.


Ingredients

Vegetable Bottom
1 munchkin pumpkin
2 medium sized carrots
Splash of cooking oil of your choice (rapeseed is my jam)
3 large chestnut mushrooms
1 small onion
Large splash of white wine
100ml double cream
Salt and pepper


Crumble Topping
30g plain flour
15gr butter
25gr pumpkin seeds
25gr walnuts
10gr roasted cocoa beans (see this recipe for more info on cocoa beans)
Salt and pepper

Method
1, Prep all your veg first.  Cut the tiny pumpkin into 8 slices and remove the inner goop. Peel and cut the carrot into little chunks.  Slice the mushrooms and the onion. Remove the hard stalky part of the cabbage and cut the cabbage into thin strips. 
2, Boil the pumpkin and carrot in a pan of salted water until tender. Drain. Remove the peel from the pumpkin.
3, In a frying pan, heat the oil over a medium heat and saute the onions until soft. Add in the mushrooms and cook until soft. 
4, Add in the large splash of white wine and simmer until reduced by at least half. Throw in the prepared carrots and pumpkin and the cabbage. Pour over the wine and gently cook until you have a thick, creamy sauce. Season to taste. 
5, Divide this between two little oven proof dishes.  I have two of these little pie dishes. Preheat your oven to 200 o/c
6, Next make the crumble topping by roughly rubbing the butter into the flour until you have a lumpy breadcrumb type consistency. Chop the pumpkin seeds, walnuts, and cocoa beans finely and season with a little salt and black pepper. Combine the whole lot together. Divide and sprinkle over the top of the mini crumbles. 
7, Bake in the oven for 20 minutes until piping hot and the topping is golden.

Sunday, 13 October 2013

Green Tomato Galette


This year, we limited ourselves to two tomato plants. Any more and I find myself in a hate spiral fuelled by tomatoes. You know the one where you find yourself in the kitchen splattered in red whilst cursing passata. No? Just me? Ok. 

Then I watched as they grew. They flowered. They started producing fruit. I carefully weeded, watered and watched some more. One exploded with glossy red fruit. The other stuck two fingers up behind my back and was like "Nah. Green tomatoes for life. You mad?"


No. Not mad. They were perfect for eating green. Crisp, sweet and tangy. The went in salad, salsa, burritos and sandwiches. Oh, and I made a galette with some too. I would only advocate this recipe if your green tomatoes are fine for eating raw - some varieties will be too sour for this.


Ingredients

Pastry
170gr plain flour
115gr cold butter
1tsp onion/garlic powder (optional)
Pinch of salt and pepper

Filling
300gr firm green tomatoes
2tbsp parmesan cheese, finely grated

Egg Wash
1 egg yolk mixed with a teaspoon of cold water and a pinch of salt.


Method
1, In a large bowl, sift in the flour, salt, pepper and onion powder.  Cut the cold butter into chunks and rub in until you have a shaggy consistency.  
2, Add in a couple of teaspoons of ice cold water and bring together using two blunt knives.  You want a ball of dough that isn't sticky. Wrap in clingfilm and chill in the fridge for at least 20 minutes.  
3, Prepare your tomatoes by slicing them to around 3-4mm in thickness and lay them out on some kitchen roll. You need to dry them off a bit or you will have a galette that leaks like hell. 
4, When your pastry is chilled, preheat your oven to 190o/c and line a baking sheet with greaseproof paper.  
5, Roll out the dough to a very rough circle of around 20-25cm. Sprinkle a teaspoon of the parmesan onto the middle of the pastry leaving a 5cm gap around the edge. Top with the tomatoes, again leaving a gap. Sprinkle over the rest of the parmesan.
6, Fold up the edges of the pastry. It's supposed to look rough and ready so don't worry about any uneven flaps. Pinch any small tears together. 
7, Brush the pastry with the egg wash and bake in the over for 25-35minutes until the pastry is golden brown and the tomatoes are soft. 
8,  This is good eaten warm or cold.  


Monday, 7 October 2013

Slow Cooker Sticky Apple Gingerbread Cake


Regardless of the weather, on exactly the first of September, people will start noticing a "chill in the air".  Because "it definitely feels autumnal" now.  You'll hear a muttering of "well, that's summer done with then".  

But autumn doesn't start for me until I get a phone call that starts with "Hello H, it's your Dad. Do you want some apples?"
Now it's autumn.  You can proceed with everything sweet and spiced.


This cake is cooked in a slow cooker and needs a good four hours.  Don't let that put you off though. It's sticky, apple topped, soft, and gingery.

Ingredients
Sticky Apple Topping
3 dessert apples
Juice of half a lemon
4 tbsp of runny honey
2 tbsp of golden syrup
Pinch of ground ginger

Gingerbread Sponge
100gr unsalted butter
80gr light brown sugar
50gr golden syrup
20gr black treacle
2 eggs
40ml water
160gr self raising flour
1tbsp ground ginger


Method
1, Turn your slow cooked onto high and place two small upturned saucers in the bottom. Pour in a couple of inches of hot water and put the lid on. You will need more hot water later so keep the kettle full.
2, Peel, core and slice the apples into eight segments. Toss them in the rest of the sticky apple topping ingredients in a small bowl and arrange them in the base of a 7 inch round cake tin. Pour whatever is left in the bowl over the top.  Set this to one side whilst you make the sponge. 
3, Melt the butter in a small saucepan and remove from the heat.  Stir through the sugar, syrup and treacle until smooth. Leave this to cool slightly and beat in the eggs and water.  Transfer this to a mixing bowl.
4, Sift in the flour, baking powder, and ginger.  Stir through until smooth and fully combined. Pour this on top of the apples carefully and it should level itself out. Take a sheet of foil, and cover the top of the cake tin. Make sure that you scrunch the edges of the foil around the edges of the cake tin. You don't want any steam getting into the cake and making it soggy. 
5, Gently lower the cake into the hot slow cooker. Make sure it doesn't touch the sides or the bottom of the slow cooker, have it rest on the saucers. Pour in more hot water until it is half way up the sides of the cake tin.
6, Put the lid on the slow cooker and cook for at least 4 hours without uncovering it. It's tempting to sneak a peak but leave it for the first four hours. If you take the lid off the slowcooker, you will increase the cooking time of the cake hugely. As every slow cooker varies, so will cooking times.  Mine was perfect at exactly four hours.  You want the top to be springy to the touch and just starting to pull away from the edges.  You can test it is cooked through by inserting a skewer. It should come out clean.
7, Serve warm or cold.

Sunday, 6 October 2013